Welcome to the Team Stamp It Group's New Years Theme Blog Hop. Whether you started the blog hop with my blog or "hopped" over to my blog from one of my teammates blog, I am happy you stopped by.

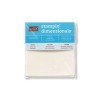
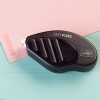
To make this fun card, randomly stamp the "fireworks" stamps from the It's a Celebration stamp set with Crushed Curry, Island Indigo and Real Red ink onto Whisper White cardstock. Cut out the 2017 using the Large Number framelits dies and a BigShot die cutting machine. Emboss the Happy New Year with Silver Embossing Powder. Adhere a 3 3/4" x 4" piece of Window Sheet to the back side of the card front panel over the 2017 and the center of the zero to the front of the Window Sheet using Fast Fuse Adhesive. Next, adhere Foam Adhesive Strips around the edge of the Window Sheet. Place three Stampin' Dimensionals along the top edge of the card front panel so that the panel will lay nicely on the Island Indigo card base. Sprinkle a small amount of the Metallics Sequin Assortment Embellishments on the lower third of the Island Indigo card base. Adhere the card front panel to the card base.

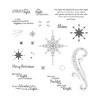
The sentiment on the inside of the card is from the Frosted Medallions stamp set. Adhere the sentiment panel to the inside card base using Fast Fuse adhesive.
I hope you enjoyed visiting my blog and looking at my projects. I would love it, if you would subscribe to my blog.
Before you "hop" onto the next blog, check out this month's Blog Hop
give-a-way!! To enter your name into the drawing, all you need to do is leave a comment on any of the blog hop posts along with your email address (so we can contact you if you win) and the phrase #stampitcontest. It's as easy as that!
This tutorial features
· Pretty Kitty Stamp Set, available in Wood or Clear Mount
The Pretty Kitty card
tutorial contains 15 full color pages of detailed instructions for creating 4
cards. You will receive a .pdf file via email automatically within 24 hours
after placing your online order with me.
Join my team and receive this and all
our exclusive group tutorials.