Saturday, December 31, 2016

Dragonfly Dreams Thank You

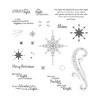
Dragonfly Dreams is a beautiful two-step photopolymer stamp set that will be available to order on January 4, 2017 in the new Occasions catalog.  The stamp set also includes a two-step bumble bee, a bokeh effect and four sentiments of encouragement.  
The wings on the dragonfly were made using Tempting Turquoise and Island Indigo ink with the Rock n' Roll Stamping technique. Don't know how to do the Rock n' Roll Stamping technique?  Scroll down to the bottom of this post for a how to video. 
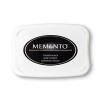
The wing detail was stamped in Memento Tuxedo Black ink.  Once the ink has dried, lightly brush over the all of the dragonfly with the clear Wink of Stella Glitter Brush to give it a touch of shimmer.  The dragonfly was cut out using the Detailed Dragonfly Thinlits Dies and the Big Shot Die Cutting Machine.
The Whisper White square panel was cut using the largest square from the Stitched Shapes Framelits die and the Big Shot Die Cutting Machine.  Using the bokeh stamp from the Dragonfly Dreams stamp set and Pool Party ink, stamp along the bottom of the Whisper White square.
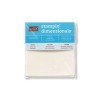
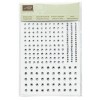
Adhere the dragonfly to the Whisper White cardstock square panel with Stampin' Dimensionals.  The enamel dot accents are from the Brights Enamel Shapes. Adhere this panel to the Island Indigo cardstock front panel with Stampin' Dimensionals.  Adhere the front panel onto a Whisper White cardbase using your favorite adhesive.
The sentiment is stamped in Island Indigo ink and is from the Paisleys & Posies Stamp set. 

Thursday, December 29, 2016

Perfect Christmas Gift

Look at the awesome engraved bone folder that my good friend, Connie Judson, gave me for Christmas. I had contemplated ordering one, but had just never gotten around to it.  Perfect gift!  Click here, if you are interested in ordering one for yourself.

Monday, December 19, 2016

Christmas Sleigh and Thanksgiving Turkeys

The Activities Director for the long term care unit of the hospital that I work for asked me if I could make the decorations that would go on the table placards for the Long Term Care residents Christmas Dinner.  This is what I came up with, I have to admit the pictures don't do them justice, they were beautiful. These were made using the Sleigh Ride Photopolymer Stamp set and matching thinlits dies. The reindeer are either on Whisper White cardstock or Dazzling Diamonds Glimmer paper.  The sleigh was made using either Whisper White cardstock with Dazzling Diamonds Glimmer paper or Silver Foil Sheets with Silver Glimmer paper.  


They had also asked me to help out for Thanksgiving.  This is what I came up with for their Thanksgiving table placards.
I didn't get a picture of the whole pile of sleighs but here's one of all the turkeys.

Saturday, December 17, 2016

New Years Theme Blog Hop

Welcome to the Team Stamp It Group's New Years Theme Blog Hop.  Whether you started the blog hop with my blog or "hopped" over to my blog from one of my teammates blog, I am happy you stopped by.  
To make this fun card, randomly stamp the "fireworks" stamps from the It's a Celebration stamp set with Crushed Curry, Island Indigo and Real Red ink onto Whisper White cardstock.  Cut out the 2017 using the Large Number framelits dies and a BigShot die cutting machine.  Emboss the Happy New Year with Silver Embossing Powder. Adhere a 3 3/4" x 4" piece of Window Sheet to the back side of the card front panel over the 2017 and the center of the zero to the front of the Window Sheet using Fast Fuse Adhesive.  Next, adhere Foam Adhesive Strips around the edge of the Window Sheet.  Place three Stampin' Dimensionals along the top edge of the card front panel so that the panel will lay nicely on the Island Indigo card base.  Sprinkle a small amount of the Metallics Sequin Assortment Embellishments on the lower third of the Island Indigo card base. Adhere the card front panel to the card base.
 The sentiment on the inside of the card is from the Frosted Medallions stamp set.  Adhere the sentiment panel to the inside card base using Fast Fuse adhesive.

I hope you enjoyed visiting my blog and looking at my projects. I would love it, if you would subscribe to my blog. 
  
Before you "hop" onto the next blog, check out this month's Blog Hop 
give-a-way!! To enter your name into the drawing, all you need to do is leave a comment on any of the blog hop posts along with your email address (so we can contact you if you win) and the phrase #stampitcontest.  It's as easy as that! 


Now through December 31, receive this Pretty Kitty card tutorial for FREE with a minimum purchase of $50 placed in my online store or when you join myStampin' Up! team.

This tutorial features 
·  Pretty Kitty Stamp Set, available in Wood or Clear Mount
The Pretty Kitty card tutorial contains 15 full color pages of detailed instructions for creating 4 cards. You will receive a .pdf file via email automatically within 24 hours after placing your online order with me.

 Join my team and receive this and all our exclusive group tutorials.