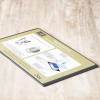
Thought I would share with you a graduation card I made for a young lady who is graduating this year. This card is a double "Z" card and was inspired by a card that I saw on Pinterest by Amanda Bates.


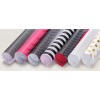
The card base is Basic Black cardstock cut to 5 1/2" x 11", scored at 2 3/4" and 5 1/2". The front panels are from the retiring Pop of Pink Designer Series Paper. The larger front panel square was cut at 5 1/4" x 5 1/4". The smaller front panel was cut at 2 1/2" x 5 1/4". The starburst is cut from the retiring Star Blast Edgelits die using Garden Green cardstock and is attached to the back of Basic Black cardstock narrow panel that is cut to 1 1/4" x 11" and scored at 2 3/4" and 5 1/2". Two of the panels on the narrow cardbase panel are also from the Pop of Pink Designer Series Paper and are cut at 1" x 5 1/4" and 1" x 2 1/2". The final panel is Whisper White cardstock and is cut at 1" x 2 1/2".
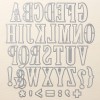
The Garden Green "2017" was cut using the Large Numbers Framelits Dies. The letters for "OF" were cut using Whisper White cardstock and the Large Letters Framelits dies. "Class" was cut using the Large Letter Framelits dies and Gold Foil sheets. The Whisper White star was cut from the retiring Stars Framelits dies and stamped in Garden Green Ink. The mortar boards were cut 1 1/4" square from the Garden Green cardstock. The tassel was stamped using the tassel stamp from the retiring Celebrate Today stamp set and Garden Green ink and then cut out with the coordinating tassel from the Balloon Framelits dies. The sentiment is from the retiring Suite Sentiments stamp set and is stamped in Garden Green Ink.
Once I had everything adhered and in place, I attached the 1 1/4" panel to the card front about an inch up from the bottom of the card attaching only about 2" of the 5 1/4" end to the left hand side of the card and all of the 2 1/2" end panel on the opposite end to the right hand side of the card, leaving the center panel free.
The Garden Green "2017" was cut using the Large Numbers Framelits Dies. The letters for "OF" were cut using Whisper White cardstock and the Large Letters Framelits dies. "Class" was cut using the Large Letter Framelits dies and Gold Foil sheets. The Whisper White star was cut from the retiring Stars Framelits dies and stamped in Garden Green Ink. The mortar boards were cut 1 1/4" square from the Garden Green cardstock. The tassel was stamped using the tassel stamp from the retiring Celebrate Today stamp set and Garden Green ink and then cut out with the coordinating tassel from the Balloon Framelits dies. The sentiment is from the retiring Suite Sentiments stamp set and is stamped in Garden Green Ink.
Once I had everything adhered and in place, I attached the 1 1/4" panel to the card front about an inch up from the bottom of the card attaching only about 2" of the 5 1/4" end to the left hand side of the card and all of the 2 1/2" end panel on the opposite end to the right hand side of the card, leaving the center panel free.
Would you like to get Stampin' Up! products at a discount? Well
now you can by signing up as a demonstrator with my team! Purchase the Stampin'
Up! Starter Kit for $99 and join my Stampin’ Up! team HERE.
Don’t wait, sign up for this awesome
opportunity today!