Showing posts with label Sweet and Sassy. Show all posts

Tuesday, February 28, 2017

St. Patrick's Day Card

This card is absolutely gorgeous.  It would work perfect for many occasions by substituting the shamrock for a leaf or with no shamrock and just the bow.
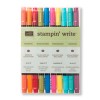
To make this card, you will need Old Olive cardstock for the card base and Whisper White cardstock for the front panel.  The flower is from the Butterfly Basics stamp set and is stamped in Basic Gray ink and colored lightly with an Old Olive Stampin' Write marker.  The shamrock was made using one of the smaller heart dies from the Sweet and Sassy Framelits set and Old Olive cardstock. The sentiment is stamped in Old Olive ink and is from the Teeny Tiny Wishes stamp set.  The sentiment label was made using the label die from the Stylish Stems Framelits dies.  The border around the sentiment label was stamped with the coordinating label stamp from the Special Reason stamp set in Old Olive ink.  The label was adhered to the card front using Stampin' dimensionals.  The gold metallic bow is from the Metallic Ribbon set that is offered as a free bonus with a qualifying order through the end of March with the Sale-A-Bration promotion.

Speaking of Sale-A-Bration now is a perfect time to join my Stampin' Up! team.
Here's how it works....
  •   For $99 you choose: Up to $229* in the Stampin’ Up! products of your choice! (*during Sale-A-Bration from January 4 – March 31, 2017.)  If you join after March 31, then it is $125 in Stampin' Up! product.
  •      Free shipping - the kit ships to you FREE!!  I don't know about you, but I love FREE!!
  • Receive a 20% discount on all subsequent orders or purchases. 
  •  If you reach $300 in purchases or sales (this amount is before your discount) by the end of your first full Stampin' Up! quarter (June 2017), your Demonstrator discount and benefits will renew for another full quarter.  If you don't, you simply drop and are no longer a Demonstrator. You don't have to do a thing.
  •   No Risk, it's like a Trial Demonstrator-ship. You can enjoy all the benefits and discounts of being a Stampin’ Up! Demonstrator while trying it out.
  •     There is no obligation to ever host a party, workshop or sell any product and definitely no pressure from me!
  • Don't wait, sign up for this awesome opportunity today!

Saturday, January 21, 2017

Valentine's Day Blog Hop


Welcome to the Team Stamp It Group Valentine's Day Blog Hop.  
Whether you started the blog hop with my blog or "hopped" over to my blog from one of my teammates blog, I am happy you stopped by.  
This Valentine card was a fun card to make using the Balloon Pop-Up and Love Notes dies, both of which are sold individually or as a bundle with their coordinating stamp set in the new 2017 Stampin' Up! Occasions catalog.  To make this card, you will need an 8 1/2" x 5 1/2" piece of Real Red card stock, scored at 4 1/4".  Using the "floral" heart stamp from the Sealed with Love stamp set, randomly stamp all over the card front with Real Red ink.
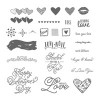
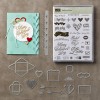
The inside of the card was made using an 8 1/2" x 5 1/2" piece of Whisper White card stock scored at 4 1/4" and the Balloon Pop-Up Thinlits dies.  Align the center of the Balloon Pop-Up die with the score line of the Whisper White card stock panel and run through the Big Shot Die Cutting Machine.  Once cut out and all of the cut away pieces are removed, you will want to trim about 3/8" off the top of the two side balloons.  Using Real Red card stock and the heart die from the Sweet and Sassy Framelits dies set that is a little larger than the center heart, cut out the center heart with the Big Shot. The lined heart was made using Real Red card stock and the lined heart die from the Love Notes Framelits set.  The third heart was made using the "heart" paper that is included in the Sending Love Designer Series Paper Stack and the matching heart from the Sweet and Sassy Framelits dies.  Adhere the center heart to the card first.   I found that if I scored the heart down the center before I adhered it on to the card it seemed to work better.  Next adhere the other two hearts to the card making sure that you are covering the balloons that are functioning as the base.  If the balloons show around the edges, use your paper snips to carefully trim the exposed balloon away.  Stamp the banner on the card inside panel with the ribbon banner stamp from the Balloon Adventures Stamp set in Real Red ink.  The sentiments are stamped in Real Red ink and are from the Sealed with Love Stamp set.  
Next fold the inside card panel in an accordion or "W" fold with the center fold as the peak and the other two folds the valley.  Because you will want the center of the card to "pop out" when you open it, adhere the inside panel about 3/8" from the side edges of the Real Red card front, only adhere the panel up to the two outer folds.  Cut two strips approximately 3/8" x 5 1/2" using the Red with White heart paper from the Sending Love Designer Series Paper Stack.  Adhere these strips to the outer edges of the inside of the card, leaving a little bit of the Real Red card base exposed and overlapping a little bit on the inside card panel. 
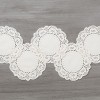
Add the Delicate White Doilies to the card front by adhering only the center "solid" part of the doilies.  The Whisper White heart is cut out using the largest heart from the Sweet and Sassy Framelits dies and the Big Shot.  The sentiment is from the Sealed with Love Stamp set and is stamped in Real Red ink.  Cut out two arrows from the Love Notes Framelits using the Big Shot and Basic Black card stock.  Adhere one of the arrows to the lower side of the heart, adhering the arrow to the back of the heart.  Cut off the "feathered" end of the other arrow and add a small amount of liquid glue to about half of the shaft.  Adhere this arrow to the front of the heart.  Adhere the heart to the card front panel using Stampin' Dimensionals.
I hope you enjoyed visiting my blog and looking at my projects. I would love it, if you would subscribe to my blog.   
Before you "hop" onto the next blog, check out this month's Blog Hop 
give-a-way!! To enter your name into the drawing, all you need to do is leave a comment on any of the blog hop posts along with your email address (so we can contact you if you win) and the phrase #stampitcontest.  It's as easy as that!