Welcome to the Stamp It Groups Christmas in July Blog Hop.
Whether you started with my blog or "hopped" over from one of
my teammate’s blogs, I am happy you stopped by!

Oh my gosh, this was such a fun card to make!! I started out thinking I would just make the front door with a wreath and maybe a bush and call it good. But after I started messing with the At Home coordinating framelits dies, I couldn't stop adding things to the card. There was even a framelit to make a window in the door. Love it!!
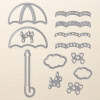
 Using the coordinating framelits dies really made this card easy. I decided since I could make the door open, I really needed to add a Christmas tree. The tree is from the Lovely as a Tree stamp set and is stamped in the newly released Tranquil Tide ink. I added a Gold Metallic Enamel Star on the top of the tree. The Real Red "ornaments" are the smaller rounds from the Brights Enamel Shapes.
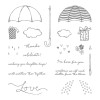
All of the die cuts are from the At Home with You stamp set and were stamped with Tuxedo Black Memento Ink onto Whisper White cardstock, cut out with the At Home framelits dies and then colored with Stampin' Write markers.

Congratulations Mary Coe!
 You are the winner of the June Summer Lovin' Theme Blog Hop!

All of the die cuts are from the At Home with You stamp set and were stamped with Tuxedo Black Memento Ink onto Whisper White cardstock, cut out with the At Home framelits dies and then colored with Stampin' Write markers.

To make the bricks for the house siding, I used the Brick Pattern Party Mask along with Embossing Paste, both are new products with Stampin' Up! The Embossing Paste is so easy to use, I placed a small amount of paste onto my silicone sheet, added a drop of Smoky Slate re-inker and mixed it together. Next, I smoothed it onto the mask, which I had secured in place over the Whisper White front panel, using one of the new Palette knives. Once the paste was all smoothed on, I removed the mask and let it dry for a few minutes. To make the "porch", I used a small piece of Wood Textures Designer Series Paper Stack. The Merry Christmas doormat was made with Crumb Cake cardstock. The presents around the bottom of the tree were stamped on to Whisper White cardstock using Tuxedo Black Memento ink and the At Home with You stamp set. I then cut out the presents using the coordinating At Home framelits die and colored them using Stampin' Write markers.

Before you hop onto the next blog, check out this month’s
Blog Hop give-a-way!! In order to enter
your name into the drawing, all you need to do is just leave a comment on any
of the Blog Hop posts along with your email address (so we can contact you if
you win) along with #stampitcontest.
It’s as easy as that!

Time is quickly running out!
The following promotions end on July 31, 2017.

Get your orders in by July 31 in order to take advantage of the Bonus Days coupons.
There is no better time than now to join my Stampin' Up! team and take advantage of all the awesome perks of being a Stampin' Up! Demonstrator.