Please join us on Friday, June 2 for our Catalog Launch Party!
Wednesday, May 31, 2017
Tuesday, May 30, 2017
Graduation Card
Thought I would share with you a graduation card I made for a young lady who is graduating this year. This card is a double "Z" card and was inspired by a card that I saw on Pinterest by Amanda Bates.
The card base is Basic Black cardstock cut to 5 1/2" x 11", scored at 2 3/4" and 5 1/2". The front panels are from the retiring Pop of Pink Designer Series Paper. The larger front panel square was cut at 5 1/4" x 5 1/4". The smaller front panel was cut at 2 1/2" x 5 1/4". The starburst is cut from the retiring Star Blast Edgelits die using Garden Green cardstock and is attached to the back of Basic Black cardstock narrow panel that is cut to 1 1/4" x 11" and scored at 2 3/4" and 5 1/2". Two of the panels on the narrow cardbase panel are also from the Pop of Pink Designer Series Paper and are cut at 1" x 5 1/4" and 1" x 2 1/2". The final panel is Whisper White cardstock and is cut at 1" x 2 1/2".
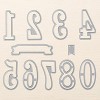
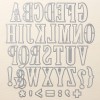
The Garden Green "2017" was cut using the Large Numbers Framelits Dies. The letters for "OF" were cut using Whisper White cardstock and the Large Letters Framelits dies. "Class" was cut using the Large Letter Framelits dies and Gold Foil sheets. The Whisper White star was cut from the retiring Stars Framelits dies and stamped in Garden Green Ink. The mortar boards were cut 1 1/4" square from the Garden Green cardstock. The tassel was stamped using the tassel stamp from the retiring Celebrate Today stamp set and Garden Green ink and then cut out with the coordinating tassel from the Balloon Framelits dies. The sentiment is from the retiring Suite Sentiments stamp set and is stamped in Garden Green Ink.
Once I had everything adhered and in place, I attached the 1 1/4" panel to the card front about an inch up from the bottom of the card attaching only about 2" of the 5 1/4" end to the left hand side of the card and all of the 2 1/2" end panel on the opposite end to the right hand side of the card, leaving the center panel free.
Would you like to get Stampin' Up! products at a discount? Well
now you can by signing up as a demonstrator with my team! Purchase the Stampin'
Up! Starter Kit for $99 and join my Stampin’ Up! team HERE.
Saturday, May 20, 2017
Father's Day Blog Hop

Welcome to the Team Stamp It Group's Father's Day Blog Hop.
Whether you started the blog hop with my blog or "hopped" over to my blog from one of my teammates blog, I am happy you stopped by.
This card is such a versatile card. It works for a Father's Day card, a Thank You card, a Sympathy card and everything else in-between. It can be used for both a masculine or a feminine card.
This card is such a versatile card. It works for a Father's Day card, a Thank You card, a Sympathy card and everything else in-between. It can be used for both a masculine or a feminine card.
I had so much fun making these watercolor cards using the High Tide stamp set. Instead of using watercolor paper I used Shimmery White paper, can I just say I am in love with the Shimmery White paper. It has just a little bit of a shimmer to it, so beautiful. The sand was first water-colored with Crumb Cake ink. Once the ink dried, I stamped the "sand" using the sand stamp from the High Tide stamp and Crumb Cake ink.
The ocean was water-colored using
Bermuda Bay ink. The sky was water-colored with Pacific Point ink. The birds were stamped using Memento Tuxedo Black ink. The grass was stamped in Old Olive ink. Once the background was complete, I adhered a coordinating color of cardstock to the card base. Then I adhered the background panel to the front of the card.
Bermuda Bay ink. The sky was water-colored with Pacific Point ink. The birds were stamped using Memento Tuxedo Black ink. The grass was stamped in Old Olive ink. Once the background was complete, I adhered a coordinating color of cardstock to the card base. Then I adhered the background panel to the front of the card.
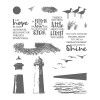
The lighthouse is a two step stamp and was stamped onto Shimmery White cardstock using Memento Tuxedo Black ink for the outline. Then stamp with the 2nd step stamp with Real Red ink to finish the lighthouse. The lighthouse was fussy cut out and adhered onto the card front using Stampin' Dimensionals. It's interesting how the three cards look different just by changing the color of the panel behind the front panel.
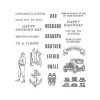
The sentiment and anchor are from the Guy Greetings stamp set, which comes in wood mount, clear mount or photopolymer, and is stamped in Memento Tuxedo Black ink.

Congratulations Stacy Cecil!

You are the winner of the April Mother's Day Blog Hop give-a-way.
Before you hop onto the next blog, check out this month’s
Blog Hop give-a-way!! In order to enter
your name into the drawing, all you need to do is just leave a comment on any
of the Blog Hop posts along with your email address (so we can contact you if
you win) and #stampitcontest.
It’s as easy as that!

How would you like to buy all your Stampin' Up! Products at a discount?
Well, now you can by signing up as a demonstrator with my team!
Purchase the Stampin' Up! Starter Kit for $99 and join my Stampin’ Up! team HERE. The really awesome part of this starter kit is that it is completely customizable, you get to choose up to $125 in Stampin' Up! products from your wish list, plus you will receive a business supply pack valued at $50, all for only $99. You build your starter kit your way with the products that you want!!
Subscribe to:
Comments (Atom)


